Thursday, August 17, 2017

Christmas Configuration Boxes

Several folks have asked me how I make my Christmas configuration boxes (Shadow Boxes). So here is step by step directions.

First I purchase a vintage shadow box. I have found these at yard sales, estate sales and thrift stores. I'm lucky because a friend bought me two that are shaped like a house at a thrift store.


Next I gather the ornaments and Christmas decorations I want to put in the shadow box. That will help me determine the size of the divisions. I use a Dremel tool with a saw blade to remove the dividers I do not need. I always remove dividers from my configuration boxes because the spaces are just too small.


These are some of the items I have collected year round for this project.  I look for old Christmas light bulbs, vintage knee elves, old bells, old seals, putz houses, bottle brush trees, flocked Santas, plastic reindeer and more. 
After removing the dividers I cover the inside of each square in scrapbook papers that will blend with the item I am going to place in that space. I use white glue using a brush to spread it smoothly over the area. I use an exacta knife to cut the paper. You could also use a paper cutter. I cover the back and inside of each cell. 

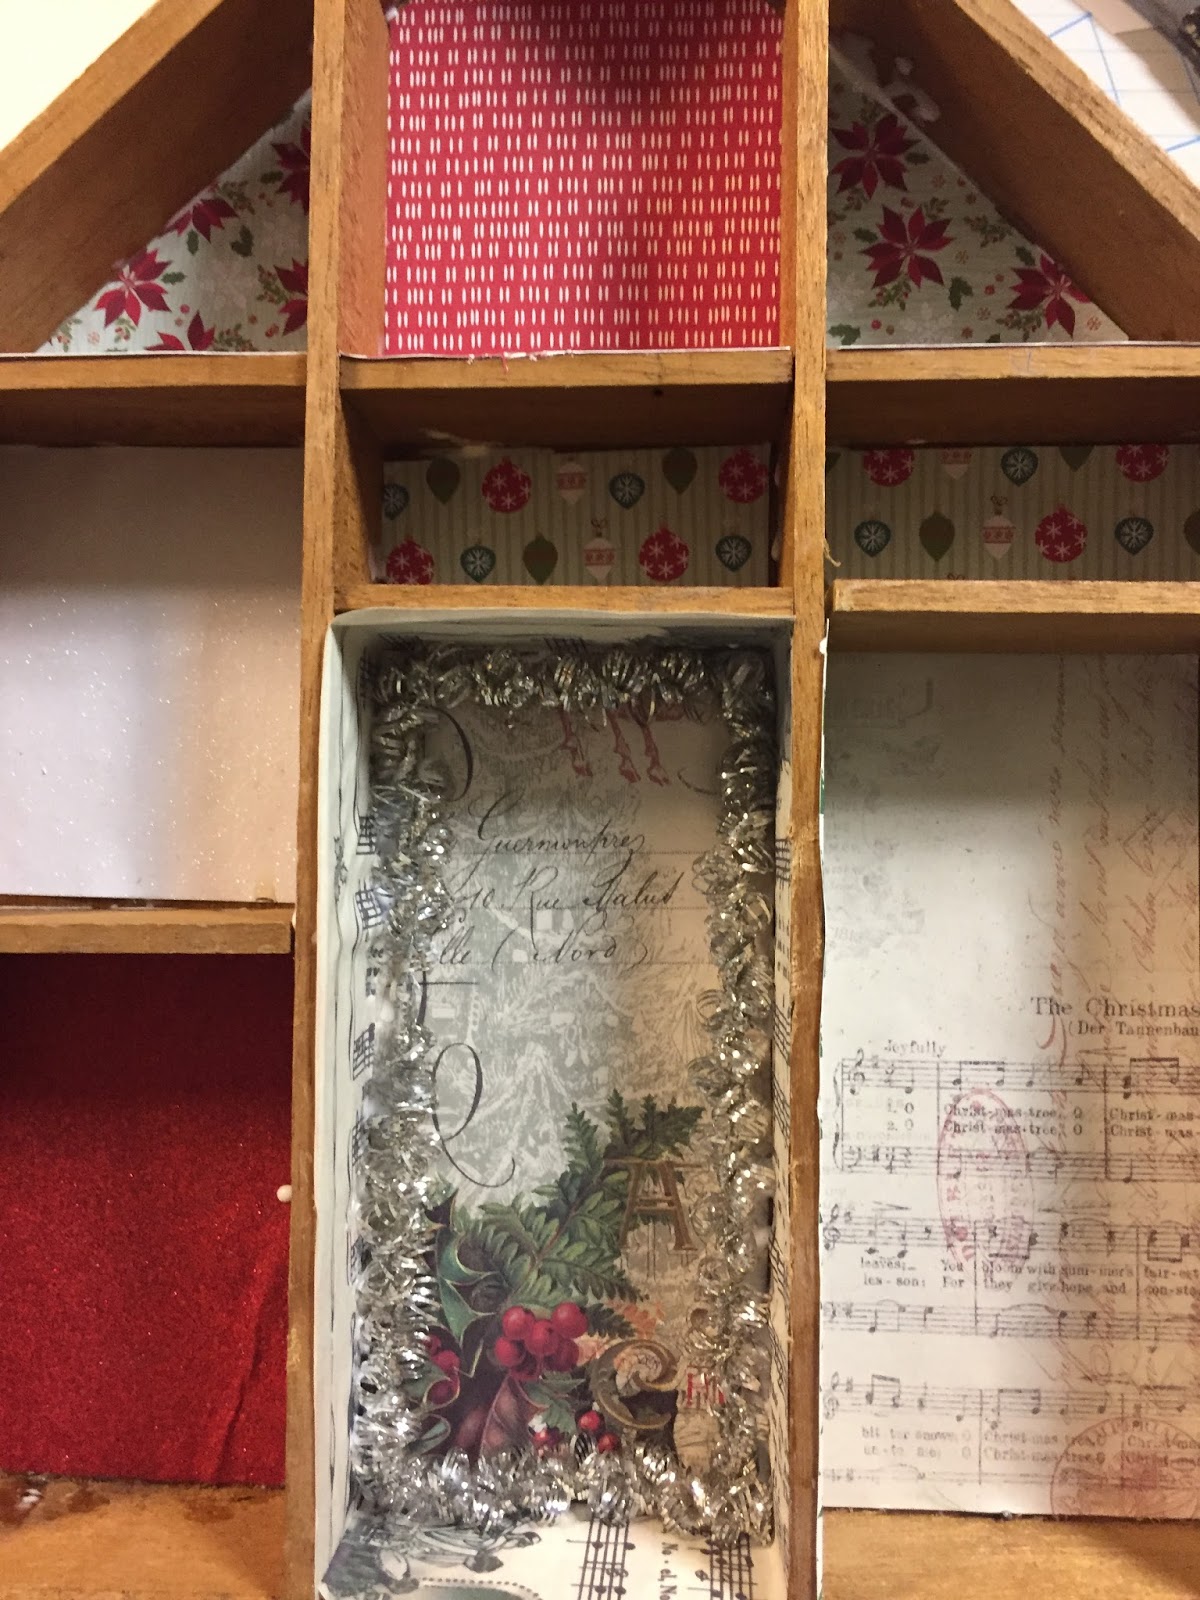
I also put vintage garland and Washi tape on the inside edges of some of the cells to add more detail.


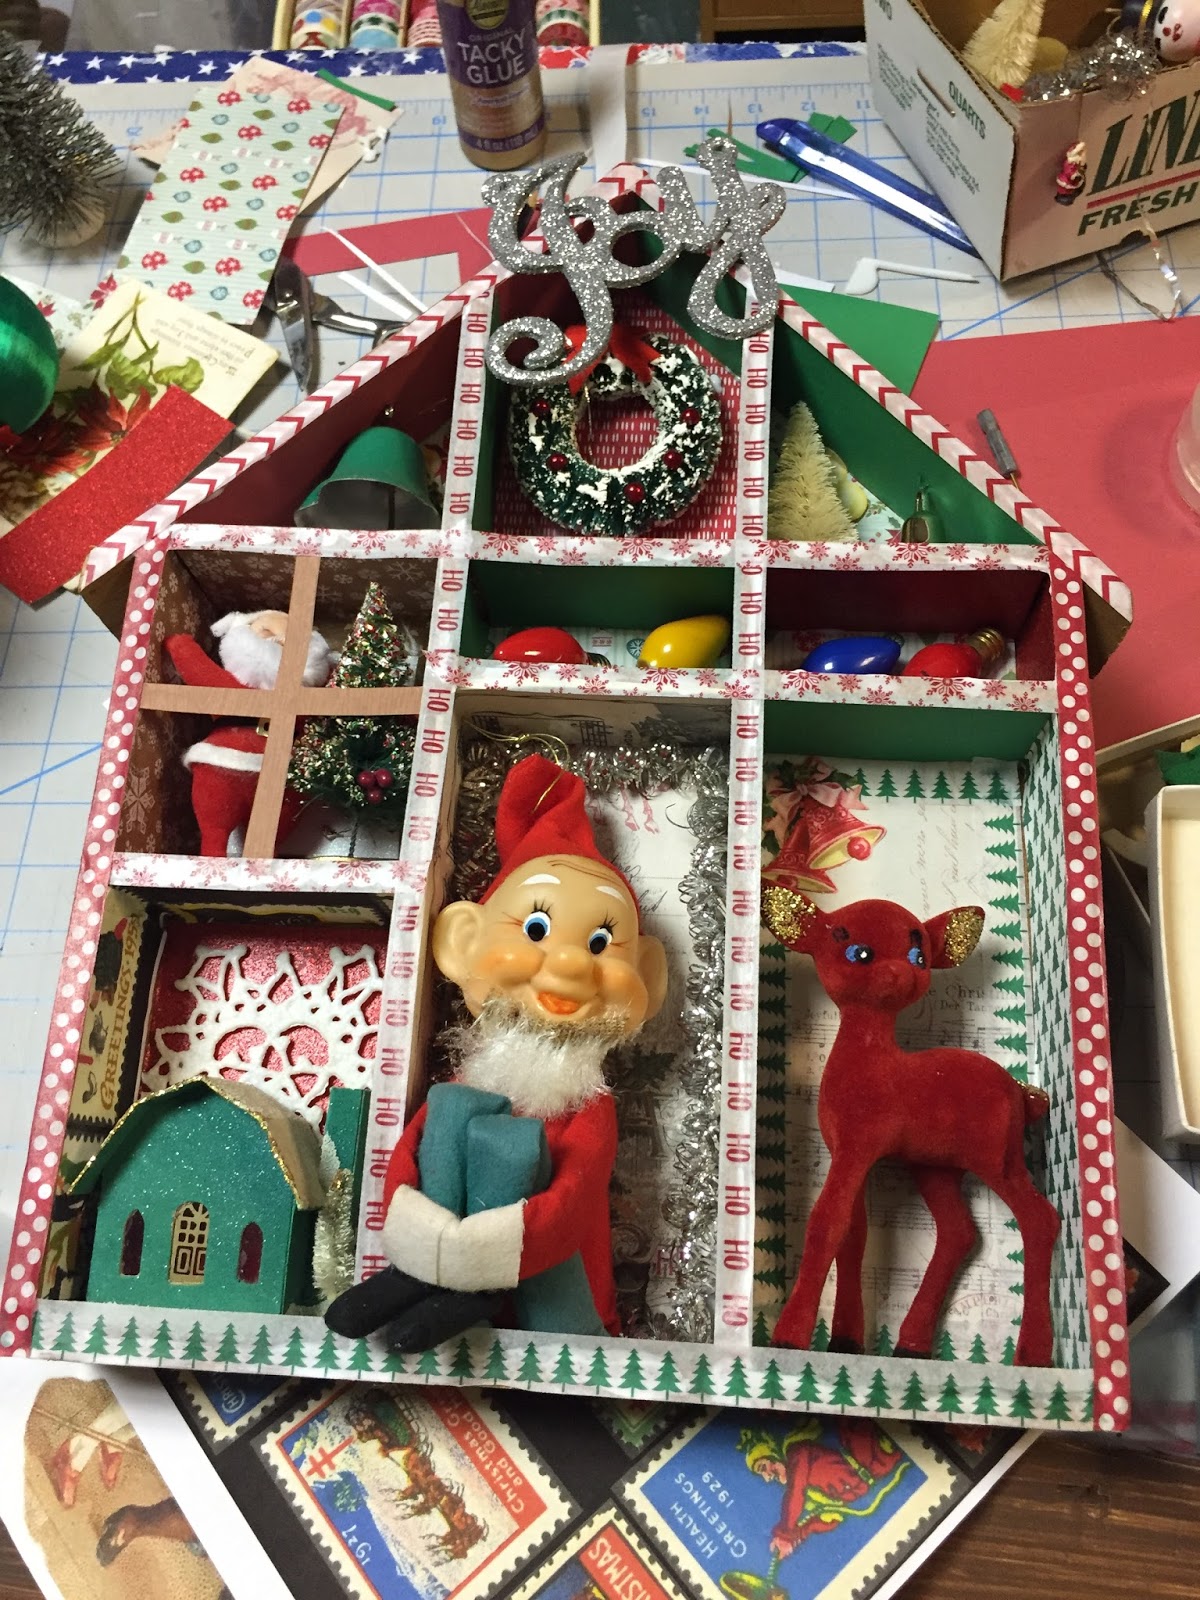
Next I put the ornaments and decorations in the cells. I use removable glue dots, white glue and even some hot glue to place the pieces in the cells. 


Next I cover the edges of each cell with narrow Washi tape. I love Washi tape but it is not the stickiest tape I have ever used. I brush white glue on the edges before placing the tape on it. 
Last year the local one dollar store had the cutest glitter cardboard Christmas ornament words. I bought as many as I could find before they got gone. I place one of these on top or in a cute place on the box. Here's my final piece. I really love it. 


Friday, August 11, 2017

Christmas in August?

Ok if you follow my blog you know I love Vintage Christmas. I dream of finding boxes of Shiny Brite Ornaments, Santa blow molds and aluminum trees. I buy lots of box lots of small Christmas items too. I'm always trying to create something new from something old which is my definition of upcycling. One thing I like to make is configuration boxes. That's a term from Tim Holtz Company that sells paper shadow boxes and other vintage looking accessories to go in them. I've used two of his boxes to create some of my own configuration or shadow boxes. But I like to find old shadow boxes and reuse them best. Here's the last one I made.


To make these I first use decide which of my collections I'm going to use. This can be a difficult task as I have a huge collection of vintage Christmas smalls. But I look for plastic deer, knee elves, Christmas light bulbs, glass ornaments and flocked Santas and snowmen. I recently went through all of my collection and sorted it into separate boxes. So it went from this (Ok and more) to nice organized boxes. 


After deciding which items I want to include I cover the inside of the shadow box with Christmas theme scrapbook paper or vintage Christmas wrapping paper. I use Christmas Washi tape to trim the edges. Then I glue using glue dots , if possible, the items into the scene. I like the glue dots because you can remove them at a later date. I found the "Joy" at a dollar store. I hope they have them again this year. Configuration boxes are lots of work,  but fun to make. 

I also have been collecting vintage tin cups to use to create a little Christmas scene. I used green floral foam to fill into the cup and covered it with snow and glitter. Then I placed a bottle brush tree with a flocked Santa.  I added an old plastic candy cane ornament, and I made a parchment paper sign with glitter on the edge. Then I spray painted an old plastic snowflake and a star and added them.  I really love how these turned out. 


So no matter what vintage items you buy at estate sales if you buy things you love you can always create something new from them. Remember "Buy what you love."


Friday, August 4, 2017

Pumpkins from Jar Rings


I have a crafters heart. I used to have a craft business, and I actually sent my son to college on my crafting business in the late 80's. When I can, I create items for my booth that I have crafted from something vintage. In this case, it is these cute pumpkins made from canning jar rings. Here's how to make your own.


Materials:

18-24
canning jar rings
Washi tape in Fall or Halloween prints
White Glue
Twine
Burlap for Leaves
Stick for stem
Orange spray paint (optional)
*Not pictured
wax paper
dowel stick or pencil

Directions:
If desired spray paint your jar rings on both sides with orange paint.


When the rings are dry press the Washi tape on the outside of the rings. If the tape is larger than the ring, clip the edges and fold over to the top or trim the tape. You may need a little white glue to hold the tape down on the top of the ring.

Continue covering the rings until you have enough to create your pumpkin.


Thread twine through the center of the rings and tie securely. The more rings you have the larger you pumpkin will be. Spread the rings out until they are separately evenly.

Find a stick that is the size of the hole in the center of your pumpkin. Cut two leaf shapes from the burlap and glue to the bottom of your stick. I tie mine on with a piece of twine to secure until it drys.


To make the curls for the top take twine and dip in white glue.Wind twine loosely around a dowel stick or pencil wrapped in wax paper, and let dry at least an hour before removing from the dowel stick.


Glue the stick you chose for the stem of the pumpkin to the inside the pumpkin with white glue and add the curl.


You can get jar rings at any grocery store or variety store but I like to find used ones at estate sales.


Learn more about estate sales in my other blog posts.
Enjoy making your own pumpkins. Or you can stop by Goodson Vintage Treasures in Just Around the Corner at 120 East Main Street, Lincolnton, NC. and buy one from me!
Check our my Facebook Page or Just Around the Corner's Page.